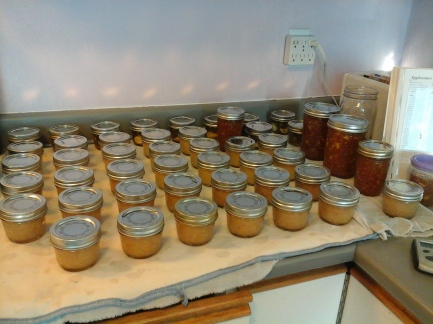
Blueberry Buckle

Blueberry Buckle

Recipe is adapted from a Better Home & Gardens 11th edition recipe.

Yield: 9 servings


2 cups flour

2 1/2 tsp baking powder

1/4 tsp salt

1/2 cup shortening

3/4 cup sugar

1 egg

1/2 cup milk

2 cups fresh or frozen blueberries

1/2 cup flour

1/2 cup sugar

1/2 tsp ground cinnamon

1/4 cup butter


Directions:


  1. Grease bottom and 1/2 inch up the sides of a 9x9x2 inch or 8x8x2 inch baking pan; set aside.
  2. Combine 2 cups flour, baking powder and salt.
  3. In another mixing bowl beat shortening with an electric mixer on medium speed for 30 seconds.
  4. Add 3/4 cup sugar. Beat on medium-high speed till light and fluffy.
  5. Add egg; beat well.
  6. Add dry mixture and milk alternately to beaten egg mixture, beating till smooth after each addition.
  7. Spoon batter into prepared pan. Sprinkle with blueberries.
  8. Combine 1/2 cup flour, 1/2 cup sugar and cinnamon. Cut in butter till mixture resembles course crumbs. Sprinkle over blueberries.
  9. Bake in 350 F oven for 50-60 minutes or till golden. Serve warm.


Raspberry Buckle: prepare as above, except substitute fresh or frozen red raspberries for the blueberries.


My review of the recipe: I love this coffee cake. I can’t wait until summer when blueberries and raspberries are fresh just so I can make this cake. A break from pies too. But I make it year round with berries that I froze during summer.

Jalapeno Poppers

Jalapeno Poppers

Recipe adapted from a recipe posted on pinterest. Originally posted on allrecipes.com by PAULA P. You can find the recipe here. http://allrecipes.com/recipe/26835/jalapeno-poppers-i/

Yield: 30 poppers

8 oz cream cheese, softened

8 oz sharp cheddar cheese, shredded

1/4 cup mayonnaise

15 fresh jalapeno peppers, halved lengthwise and seeded

2 eggs, beaten

1/2 tbsp milk

1 1/2 cup crushed corn flake cereal, I use bread crumbs

Directions:

  1. Preheat oven to 350 F. Lightly grease a medium baking sheet.
  1. In a medium bowl, mix together cream cheese, shart cheddar cheese and mayonnaise. Stuff jalapeno halves with the mixture.
  1. Whisk together eggs and milk in a small bowl. Place crushed corn flake cereal or bread crumbs in a separate small bowl.
  1. Dip each stuffed jalapeno half into the egg mixture, then roll in cornflakes or breadcrumbs to coat.
  1. Arrange in a single layer on the prepared baking sheet. Bake in preheated oven 30 minutes, or until filling is bubbly and lightly browned.

Notes from the original poster Sharp cheddar cheese is the rich, delicious filling for these spicy favorites. They are baked rather than deep fried. You’ll want to pop them down one after another.

My review of the recipe: I love these. I thought I loved the ones I used to get in restaurants until I had these. Now the restaurant ones don’t stand against these. I make a double batch of these at the end of every summer when jalapenos are fresh from the farm stand. I make them for myself because I am the only one that eats spicy stuff in my house. I have been known to share them with co-workers at potlucks too. I know make a sweet pepper version for my family. I make and freeze these. To reheat I put them in a 400 F oven for 10-15 minutes.

Peach Applesauce

Peach Applesauce

Recipe adapted from a recipe found on pinterest, but canned using bernardin’s canning instructions, for food safety.

Yield: 5 pints
5 lbs apples, cored, quartered (skins on)
2 lbs peaches, pitted, sliced (skins on)
4 tbsp lemon juice
2-4 cups water

Directions

  1. Prepare canner, jars and lids.
  2. In a large stainless steal saucepan, combine apples with just enough water to prevent sticking. Bring to a boil over medium-high heat. Reduce heat and boil gently, stirring occasionally, for 5-20 minutes, until apples are tender (time will depend upon the variety of apple and their maturity.)
  3. Remove from heat and let cool slightly, about 5 minutes.
  4. Working in batches, transfer apples to a food mill or a food processor fitted with a metal blade and puree until smooth.
  5. Return apples puree to saucepan. Add sugar, if using, and lemon juice; bring to a boil over medium-high heat, stirring frequently to prevent sticking. Maintain a gentle boil over low heat while filling jars.
  6. Ladle hot applesauce into hot jars, leaving 1/2inch head-space. Remove air bubbles and adjust head-space, if necessary, by adding hot applesauce. Wipe rime. Center lid on jar. Screw band down until resistance is met, then increase to fingertip-tight.
  7. Place jars in canner, ensuring they are completely covered with water, by at least 1 inch. Bring to a boil and process both pint (500 ml) and quart (1L) jars for 20 minutes. Remove canner lid. Wait 5 minutes, then remove jars, cool and store.

Notes: Lemon juice is not an optional addition. Lemon juice is added to help preserve the apples’ natural color and to assure the acidity of the finished produce, since different varieties and harvesting conditions can produce apples of lower acidity.

My review of the recipe: I liked this recipe I did have to change the directions from the original poster, they had you filling the jars and inverting them, instead of processing in a boiling-water bath. Which is what I do to all my canning. I want a nice strong vacuum seal on my jars, if I put all that effort and money into canning I want to make sure they are going to seal properly. My kids liked the different flavor for their applesauce. I started making applesauce after they requested that I buy the little containers of applesauce for them. It was apple season and being a canner I wasn’t going to spend money on something I could make. I can this in 1/2 cup jars. It doesn’t have much a peach color. I don’t mind it though, I can things to keep them as natural as possible.

Strawberry Applesauce

Strawberry Applesauce

Recipe adapted from a recipe found on pinterest, but canned using bernardin’s canning instructions, for food safety.

Yield: 5 pints
5 lbs apples, cored, quartered (skins on)
3 cups strawberries, hulled
4 tbsp lemon juice
2-4 cups water

Directions

  1. Prepare canner, jars and lids.
  2. In a large stainless steal saucepan, combine apples with just enough water to prevent sticking. Bring to a boil over medium-high heat. Reduce heat and boil gently, stirring occasionally, for 5-20 minutes, until apples are tender (time will depend upon the variety of apple and their maturity.)
  3. Remove from heat and let cool slightly, about 5 minutes.
  4. Working in batches, transfer apples to a food mill or a food processor fitted with a metal blade and puree until smooth.
  5. Return apples puree to saucepan. Add sugar, if using, and lemon juice; bring to a boil over medium-high heat, stirring frequently to prevent sticking. Maintain a gentle boil over low heat while filling jars.
  6. Ladle hot applesauce into hot jars, leaving 1/2inch head-space. Remove air bubbles and adjust head-space, if necessary, by adding hot applesauce. Wipe rime. Center lid on jar. Screw band down until resistance is met, then increase to fingertip-tight.
  7. Place jars in canner, ensuring they are completely covered with water, by at least 1 inch. Bring to a boil and process both pint (500 ml) and quart (1L) jars for 20 minutes. Remove canner lid. Wait 5 minutes, then remove jars, cool and store.

Notes: Lemon juice is not an optional addition. Lemon juice is added to help preserve the apples’ natural color and to assure the acidity of the finished produce, since different varieties and harvesting conditions can produce apples of lower acidity.

My review of the recipe: I liked this recipe I did have to change the directions from the original poster, they had you filling the jars and inverting them, instead of processing in a boiling-water bath. Which is what I do to all my canning. I want a nice strong vacuum seal on my jars, if I put all that effort and money into canning I want to make sure they are going to seal properly. My kids liked the different flavour for their applesauce. I started making applesauce after they requested that I buy the little containers of applesauce for them. It was apple season and being a canner I wasn’t going to spend money on something I could make. I can this in 1/2 cup jars. This doesn’t have the red color like the purchased Strawberry Applesauce. If you really want you can add a few drops of red food color. I leave it natural.

Blueberry Applesauce

Blueberry Applesauce

Recipe adapted from a recipe found on pinterest, but canned using bernardin’s canning instructions, for food safety.

Yield: 5 pints

5 lbs apples, cored, quartered (skins on)
2 cups blueberries
4 tbsp lemon juice
2-4 cups water

Directions

  1. Prepare canner, jars and lids.
  2. In a large stainless steal saucepan, combine apples with just enough water to prevent sticking. Bring to a boil over medium-high heat. Reduce heat and boil gently, stirring occasionally, for 5-20 minutes, until apples are tender (time will depend upon the variety of apple and their maturity.)
  3. Remove from heat and let cool slightly, about 5 minutes.
  4. Working in batches, transfer apples to a food mill or a food processor fitted with a metal blade and puree until smooth.
  5. Return apples puree to saucepan. Add sugar, if using, and lemon juice; bring to a boil over medium-high heat, stirring frequently to prevent sticking. Maintain a gentle boil over low heat while filling jars.
  6. Ladle hot applesauce into hot jars, leaving 1/2 inch head-space. Remove air bubbles and adjust head-space, if necessary, by adding hot applesauce. Wipe rime. Center lid on jar. Screw band down until resistance is met, then increase to fingertip-tight.
  7. Place jars in canner, ensuring they are completely covered with water, by at least 1 inch. Bring to a boil and process both pint (500 ml) and quart (1L) jars for 20 minutes. Remove canner lid. Wait 5 minutes, then remove jars, cool and store.

Notes: Lemon juice is not an optional addition. Lemon juice is added to help preserve the apples’ natural color and to assure the acidity of the finished produce, since different varieties and harvesting conditions can produce apples of lower acidity.

My review of the recipe: I liked this recipe I did have to change the directions from the original poster, they had you filling the jars and inverting them, instead of processing in a boiling-water bath. Which is what I do to all my canning. I want a nice strong vacuum seal on my jars, if I put all that effort and money into canning I want to make sure they are going to seal properly. My kids liked the different flavor for their applesauce. I started making applesauce after they requested that I buy the little containers of applesauce for them. It was apple season and being a canner I wasn’t going to spend money on something I could make. I can this in 1/2 cup jars. When boiling the apples and blueberries together the apples start to look like beets. Sorry the picture isn’t very clear for that picture, I had a crappy cell phone at that time and the steam coming off the fruit didn’t help.


Secret Ingredient Frugal Pesto

Secret Ingredient Frugal Pesto

Recipe adapted from a recipe posted on pinterest. Originally posted on anoregoncottage.com, via pinterest. You can find the recipe here: http://anoregoncottage.com/pantry-basics-frugal-pesto/

Yield: 1 1/4 cups

5-6 cloves garlic, peeled

1/4 cup sunflower seeds, see tip below

1/2 cup grated parmesan cheese

1 tsp salt, or to taste

2 1/2 cup lightly packed basil leaves, washed and dried

1 tbsp lemon juice, for freezing to keep pesto a brighter green after opening

3/4-1 cup olive oil, plus more if freezing

Directions:

  1. Pulse garlic in a food processor until minced.
  2. Add seeds, cheese, and salt. Pulse a few times to chop, and then add the basil and continue to process until most is chopped (it’s okay if not all is chopped – it will mince as the oil is added).
  3. Add lemon juice now, if using.
  4. With the machine running, add the oil in a fine stream. Process until pesto is smooth.
  5. Adjust salt to taste, if needed (less will be needed if using salted sunflower seeds).

To store in the freezer, pour about 1/2 cup into freezer-safe containers, add a shallow layer of olive oil to cover the tops, attach lids, label with date and freeze. The frozen pesto keeps for about a year – if it lasts that long.

Notes from the original poster: Frugal (aka, cheap) homemade pesto with an alternative to expensive pine nuts that we like even better!  I use roasted sunflower seeds for the extra flavor, but raw seeds will work too.

My review of this recipe: I love this recipe so much I make a triple batch of it to freeze at the end of every summer, to use though out the year. Our favourite way to use this is to stuff it into chicken or pork chops, bread and bake them, sometimes we even stuff it with Laughing Cow Cheese or feta cheese with the pesto.I freeze this in 1/2 cup canning jars and in ice cube trays for easy smaller portions for when I just need a little bit. Just pop the ice cube pesto out and store in a freezer bag once solid.

The first picture is when I made a double batch, the second is of a triple batch.

Candied Jalapenos, aka Cowboy Candy

Candied Jalapenos, aka Cowboy Candy

Recipe adapted from a sparkpeople.com recipe, posted by IWANNAGOAT

3 lbs fresh jalapeno peppers,

2 cups cider vinegar

6 cups sugar

1/2 tsp tumeric

1/2 tsp celery seeds

1 tbsp granulated garlic

1 tsp ground cayenne pepper

Directions:

  1. Prepare canner, jars, and lids.
  2. Wearing gloves, remove the stems from all the jalapeno peppers. The easiest way to do this is to slice a small disc off the stem end along with the stem. Discard the stems. Slice peppers into 1/8-1/4 inch rounds. Set aside.
  3. In a large post, bring cider vinegar, sugar, turmeric, celery seeds, granulated garlic and cayenne pepper to a boil. Reduce heat and simmer 5 minutes. Add pepper slices and simmer for exactly 4 minutes. Use a slotted spoon to transfer the pepper slices into clean, sterilized canning jars to within 1/4 inch of the rim of the jar. Turn heat up under the pot with the syrup and bring to a full rolling boil. Boil hard for 6 minutes.
  4. Use a ladle to pour the boiling syrup into the jars over the jalapeno slices. Insert a cooking chopstick or plastic knife to the bottom of jar two-three times to release any trapped pockets of air. Adjust the level of syrup if necessary.
  5. Wipe the rims of the jars with a clean, damp paper towel. Center lid on jar. Screw down until resistance is met, then increase to fingertip-tight.
  6. Place jars in canner, ensuring they are completely covered with water. Bring to a boil and process for 10 minutes.
  7. Remove canner lid. Wait 5 minutes, then remove jars, cook and store.

My review of the recipe: I made this recipe in 2015. I was interested in this recipe after everyone in my Sparkpeople Putting It Up Team were talking about Cowboy Candy. I like the sweet spicy peppers at the sub shop, but I didn’t find these anything like those. I decided to just go back to my usual pickled jalapeno slices, they go better with the things I normally eat pickled jalapeno slices with anyways. It is a good recipe, just not what I wanted.


Best Apple Jam

Best Apple Jam

Recipe adapted from a Food.com recipe, posted by michEgan. You can find the recipe here: http://www.food.com/recipe/best-apple-pie-jam-100315

Yield: 3 pints

4 cups apples, chopped

1 1/2 tbsp lemon juice

1 box powdered pectin

1 tsp butter

1 tsp cinnamon

1/4 tsp nutmeg

1/4 tsp ginger

4 cups sugar

1 cup brown sugar, packed

Directions:

  1. Prepare canner, jars, and lids.
  2. Measure apples in a measuring cup, now add in the same measuring cup water to fill up to the 4 cup line, with apples in it.
  3. Add lemon juice, pectin, butter and spices.
  4. Add sugar all at once and return to a full rolling boil, stirring constantly. Boil hard, stirring constantly, for 1 minute. Remove from heat, and quickly skim off foam.
  5. Ladle into hot jars, leaving 1/4 inch headspace. Wipe rim. Center lid on jar. Screw down until resistance is met, then increase to fingertip-tight.
  6. Place jars in canner, ensuring they are completely covered with water. Bring to a boil and process for 10 minutes.
  7. Remove canner lid. Wait 5 minutes, then remove jars, cook and store.

My review of the recipe: I like this recipe, no more doing math from the other recipe I had for Apple Jam that only called for 1 cup of fruit to 4 cups sugar.

20140914_180025

Apricot Jelly

Apricot Jelly

Recipe adapted from a Bernardin recipe, from Complete Book of Home Preserving

Yield: 5-8 oz jars

3 cups apricot juice for jelly, see tip below

1/2 cup lemon juice

1 package powdered pectin

5 cups sugar

Directions:

  1. Prepare canner, jars, and lids.
  2. In a large, deep stainless steel saucepan, place apricot juice. Whisk in pectin until dissolved. Bring to a boil over high heat, stirring frequently.
  3. Add sugar all at once and return to a full rolling boil, stirring constantly. Boil hard, stirring constantly, for 1 minute. Remove from heat, and quickly skim off foam.
  4. Quickly pour hot jelly into hot jars, leaving 1/4 inch headspace. Wipe rim. Center lid on jar. Screw down until resistance is met, then increase to fingertip-tight.
  5. Place jars in canner, ensuring they are completely covered with water. Bring to a boil and process for 10 minutes.
  6. Remove canner lid. Wait 5 minutes, then remove jars, cook and store.

Tip: In a large stainless steel saucepan, place washed, halved apricots. Add 1/2 cup water for each 1 lb apricots. Bring to a boil over high heat, stirring frequently. Reduce heat, cover loosely and boil gently, stirring and crushing apricots occasionally, just until apricots are softened, about 20 minutes. Do not overcook, as it reduces flavour, color and strength of the pectin.

Transfer apricot mixture to a dampened jelly bag or a strainer lined with several layers of dampened cheesecloth set over a deep bowl. Let drip, undisturbed, for at least 2 hours or overnight to collect juice.

For each cup of apricot juice, you’ll need about 1 lb apricots.

My review of the recipe: I made this only once, my kids weren’t too thrilled with jelly.

Cherry Jelly

Cherry Jelly

Recipe adapted from a Bernardin recipe, from Complete Book of Home Preserving

Yield: 7-8 oz jars

3 1/2 cup cherry juice for jelly, see tip below

4 tbsp lemon juice

7 cups sugar

2 pouches liquid pectin

Directions:

  1. Prepare canner, jar and lids.
  2. In a large, deep stainless steel saucepan, combine cherry juice and sugar, over high heat, stirring constantly, bring to a full rolling boil that cannot be stirred down.
  3. Stir in pectin. Boil hard, stirring constantly, for 1 minute. Remove from heat and quickly skim off foam.
  4. Quickly pour hot jelly into hot jars, leaving 1/4 inch headspace. Wipe rim, Center lid on jar. Screw band down until resistance is met, then increase to fingertip-tight.
  5. Place jars in canner, ensuring they are completely covered with water. Bring t o a boil and process for 10 mines.
  6. Remove canner lid. Wait 5 minutes, then remove jars, cook and store.

Tip: For each cup cherry juice, use about 1 lb whole cherries.

Gently wash and drain cherries. In a large stainless steel saucepan combine cherries with just enough water to prevent scorching, about 1/4-1/2 cup water for every 4 cups cherries. Bring to a boil over medium-high heat, stirring frequently. Reduce heat, cover loosely and boil gently, stirring and crushing cherries occasionally, just until cherries are softened 5-10 minutes.

Transfer cherry mixture to a dampened jelly bag or a strainer lined with several layers of dampened cheesecloth set over a deep bowl. Let drip, undisturbed, for at least 2 hours or overnight to collect juice.

My review of the recipe: I made this only once. My kids weren’t too trilled with jelly they prefer jam.

100_1067